Unlock Insights Instantly: BigQuery + **Terno AI **
Managing and analyzing massive datasets is no longer a developer-only job. With **Terno AI’s seamless BigQuery integration**, you can now connect, query, and visualize enterprise-scale data — all through an intuitive, no-code interface.** What This Integration Does**
Terno AI directly connects with your Google BigQuery warehouse. You can:
Generate instant dashboards for sales, inventory, or customer analytics.
Import live datasets in seconds — no manual CSV uploads needed.
Run intelligent, AI-assisted queries without writing SQL.
Detect anomalies, predict demand, or segment customers using Terno’s built-in AI models.
Locate a Public Dataset in BigQuery
Before connecting BigQuery to Terno AI, let’s start with a dataset to explore. If you already have your own project data in BigQuery, you can skip this step. However, if you’re new to BigQuery or just want to experiment, Google provides hundreds of public datasets from e-commerce to weather to healthcare that anyone can query for free. Here’s how to find them:
- Open the BigQuery Console: https://console.cloud.google.com/bigquery .
- In the left navigation pane, click “Add Data” → “Explore Public Datasets.”
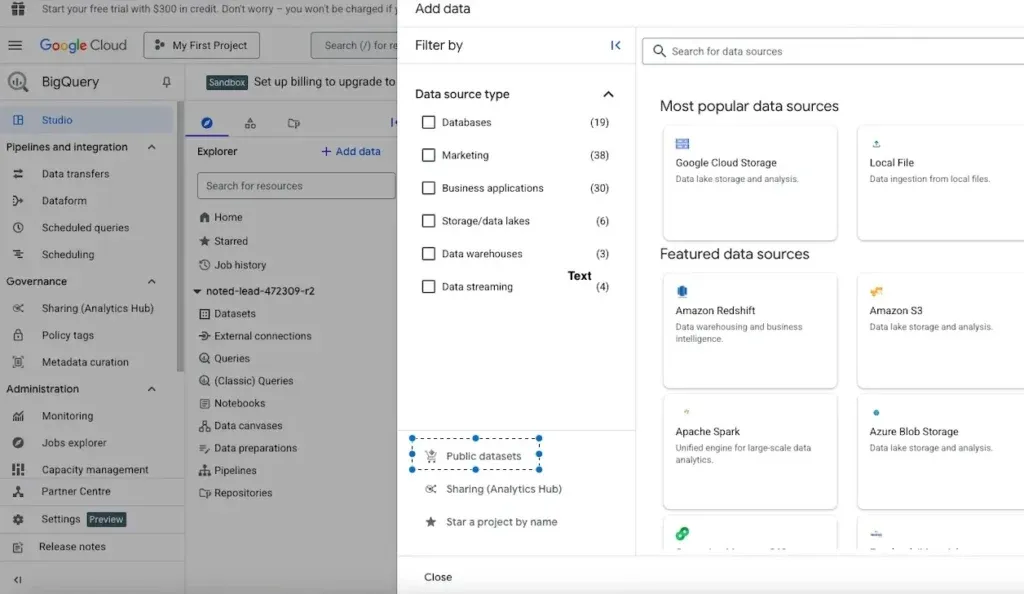
- You will see Google’s dataset marketplace. Click on the ‘Public datasets’ and search for something relevant, like “ecommerce,” “retail,” or “sales.”
- For our tutorial, let’s use bigquery-public-data.thelook_ecommerce—a simulated online retail dataset that includes orders, products, inventory, and customer demographics.
- Click “View Dataset” → “Open in Explorer” to preview the tables. You’ll now see sample data you can query right away.
Create a Service Account & JSON Key for Access
To let Terno AI or any other app access this dataset, you’ll need a service account with appropriate permissions, plus a JSON credentials file.
Step A: Create a Service Account
In the Google Cloud console, go to IAM & Admin → Service Accounts. Click to know more -> docs.aws.amazon.com/dms/latest/sbs/bigquery-redshift-migration-step-1.html.
Click Create Service Account.
Give it a name of your choice (e.g. terno_scratch)
Optionally add description
Assign it roles/permissions. For your use case, roles like BigQuery Data Viewer, BigQuery Job User, or BigQuery Admin are common.
Continue until the service account is created.
Step B: Generate JSON Key
In the Service Account detail page, go to Keys tab.
Click Add Key → Create new key. Choose JSON format.
Click here for more details -> https://cloud.google.com/iam/docs/keys-create-delete
Google will download the JSON file (e.g. service-account-xxxx.json) — store it securely.
Note: If you lose the JSON file, you cannot re-download it. You can generate a new key and deactivate the old one.
Steps to Integrate BigQuery with Terno AI
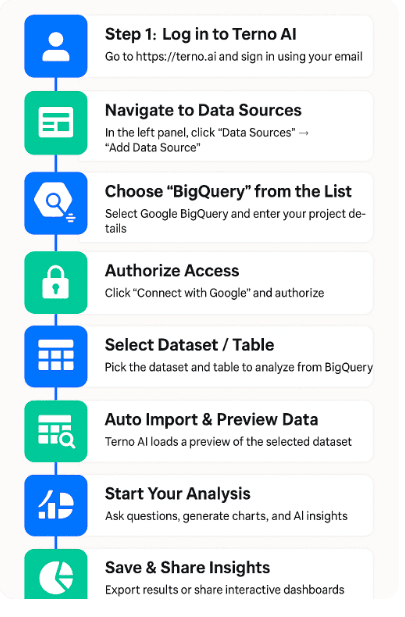
Terno gives you two easy ways to connect your BigQuery data — choose whichever suits your
workflow best:
From the Admin Panel (Recommended for setup and management) — Add and
manage multiple sources from your workspace sidebar.From the Chat Interface (Recommended for quick analysis) — Add your data source
while starting a new chat.
Below are detailed steps for both methods
Method 1: Add Data Source via Admin Panel
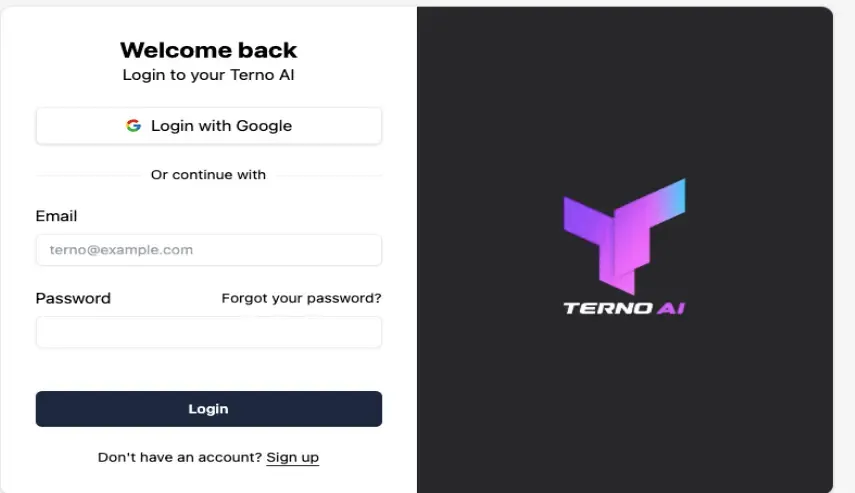
Step 1: Log in to Terno AI
Go to https://terno.ai and sign in using your registered email ID.
Once inside, you’ll land on your Terno Workspace where all your datasets and analyses live.
Step 2: Navigate to Data Sources
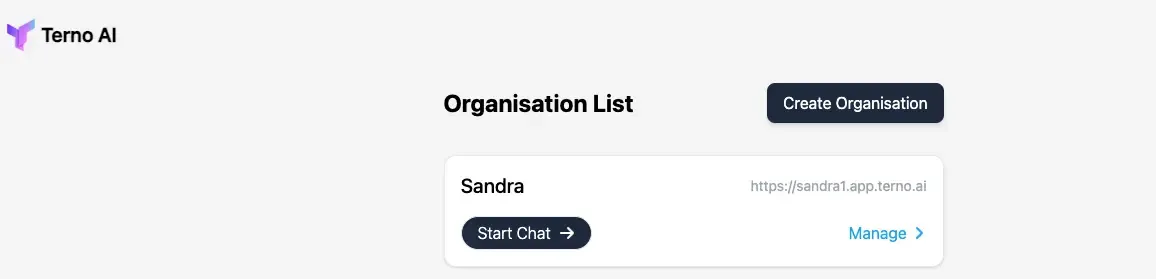
In the panel, click on “Manage”
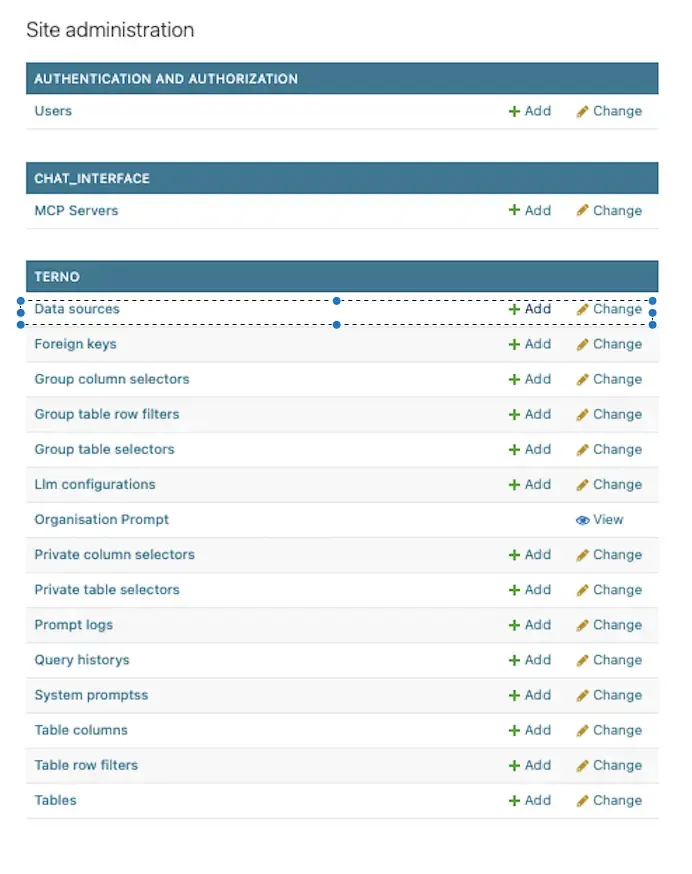
Next, under Terno navigate to “ Data Sources – > Add"
Then, Add Data Source page will open.
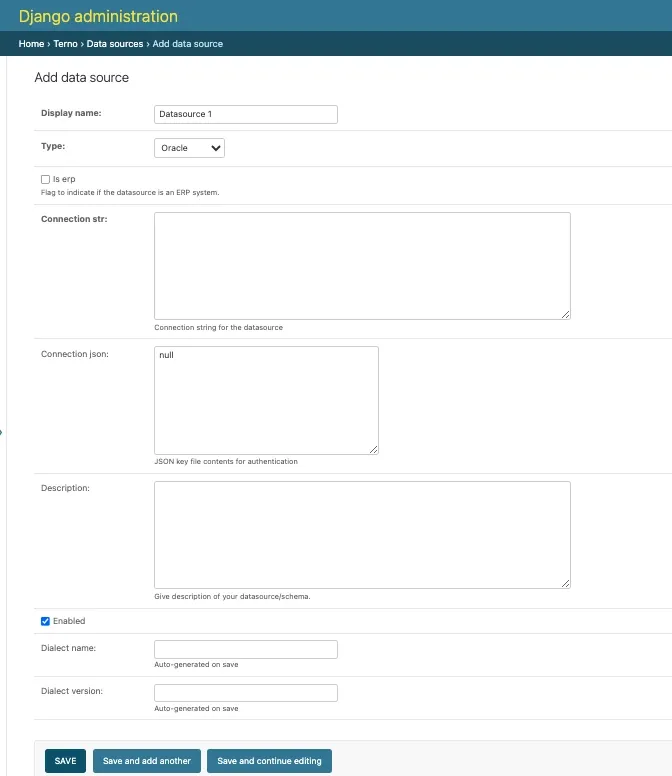
This is where you can connect cloud data platforms like Oracle, BigQuery, Snowflake, etc.
Step 3: Enter your project details
Terno will prompt you to enter your BigQuery project details
Enter Display Name
In the Display Name field, type a recognizable name for your connection e.g., _thelook_ecommerce _.
This name helps you identify your connection later when multiple sources are added.
Choose Type: “BigQuery”In the Type dropdown, select BigQuery.
This tells Terno that you’re connecting to a Google BigQuery data warehouse.
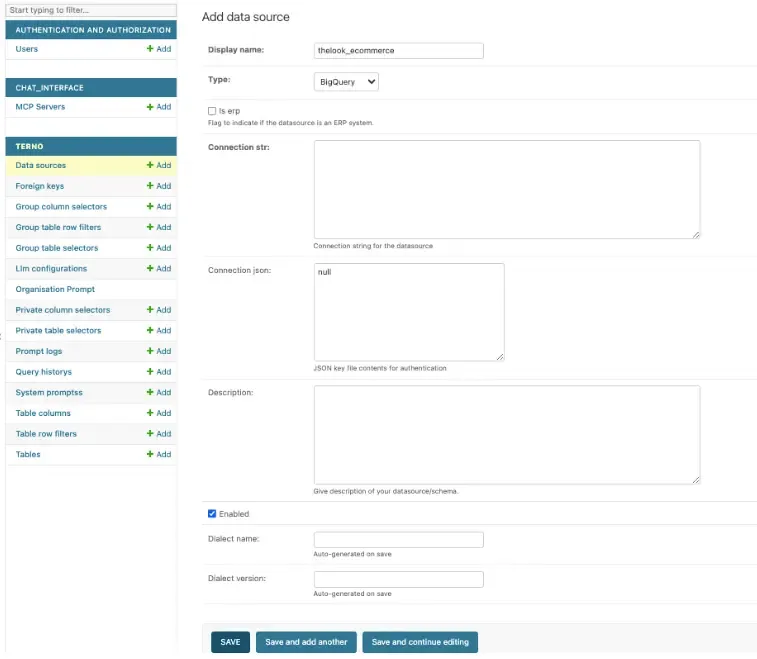
** Step 4: Add Connection URL**
Paste your BigQuery connection URL in the connection str:
Example format:
bigquery://project_id.dataset_name.table_name
This defines which BigQuery dataset Terno will access.
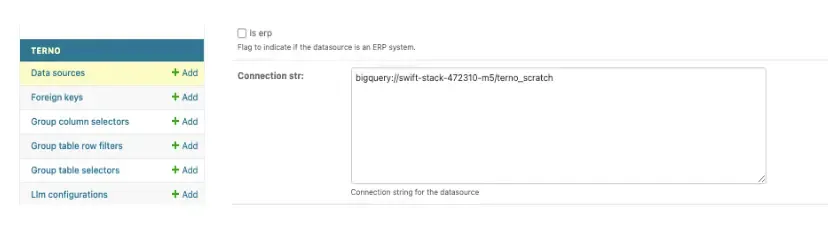
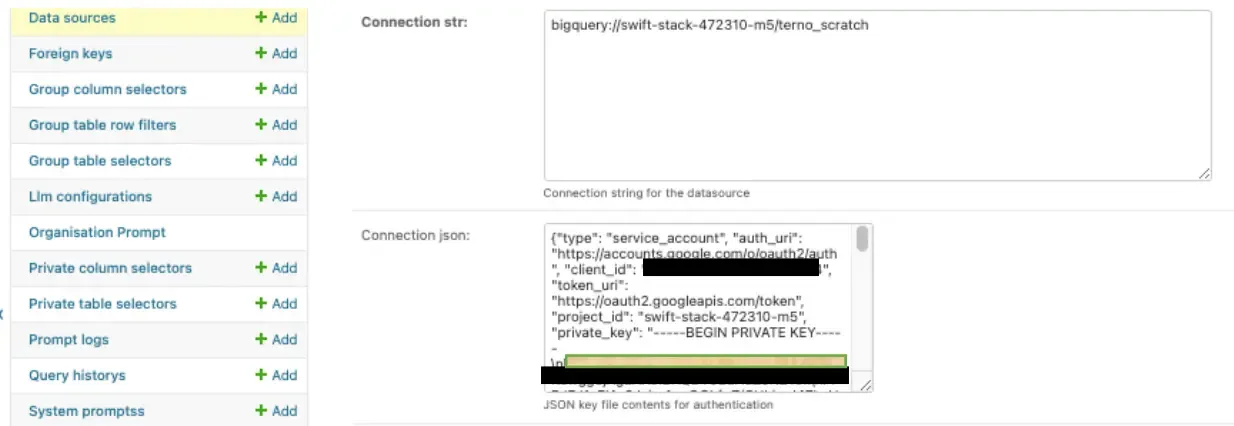
Step 5: Enter Connection JSON
Copy your BigQuery service account credentials JSON file content and paste it into this field.
This file is generated in your Google Cloud Console when you create a service account for BigQuery access.
Make sure to include the entire JSON structure — it contains keys like:
{
"type": "service_account",
"project_id": "your-project-id",
"private_key_id": "xxxxxx",
"private_key": "—–BEGIN PRIVATE KEY—–",
"client_email": "service-account@project-id.iam.gserviceaccount.com"
}
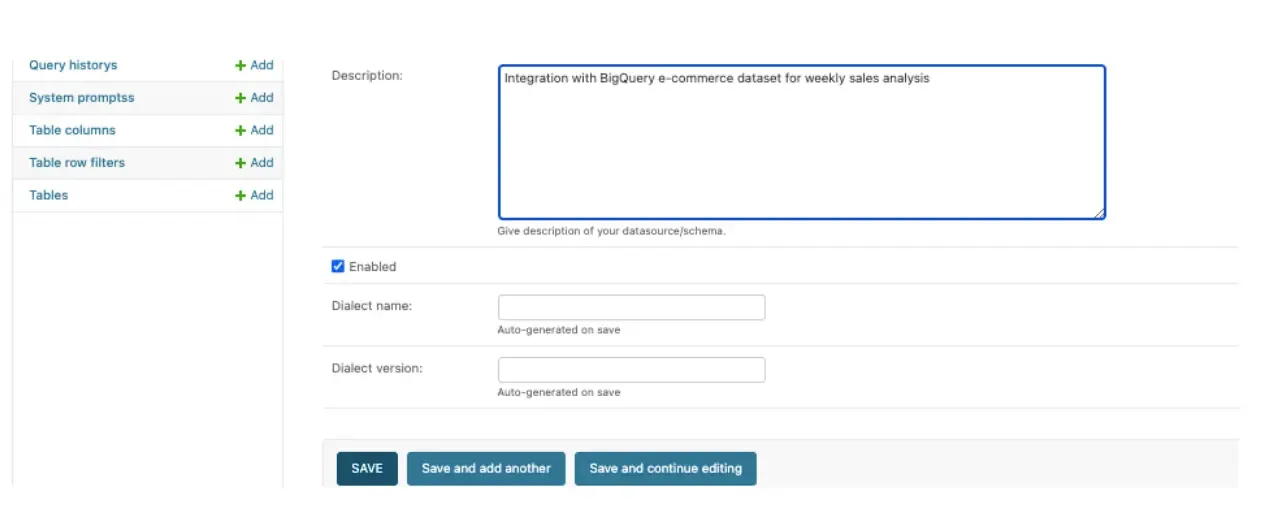
Add Description (Optional)
You can write a short note like:
“Integration with BigQuery e-commerce dataset for weekly sales analysis.”
Helpful for documentation if you manage multiple connections.
Step 6: Enable the Connection
- Ensure the “Enabled” checkbox is ticked so Terno can actively use this data source.
** Step 7: Save Your Configuration**
Click “Save” or “Save and Continue Editing” once all details are filled.
Terno AI will validate your credentials and establish a secure connection with BigQuery.
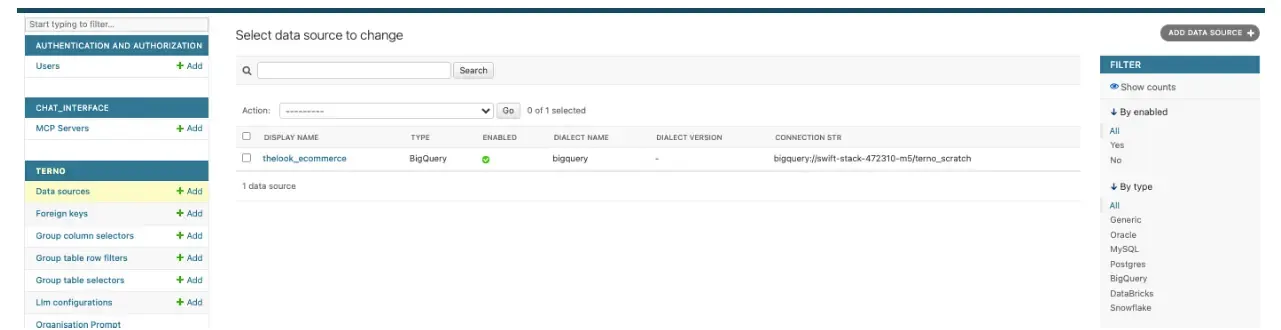
Verification Step
After saving, go to Data Sources → Manage Sources.
Your BigQuery connection should appear as **Enabled **.
You can now select this source to start your analysis.
You’re Connected!
You’ve successfully linked BigQuery with Terno AI.
Now you can:
Explore datasets instantly without writing SQL.
Create visualizations and AI-driven insights.
Detect sales anomalies, demand shifts, or customer trends — right from the Terno dashboard.
Select Dataset / Table in the Terno AI dashboard
Once connected in the Terno AI dashboard, start a new chat and browse your available datasets.
Pick the one you want to analyze — for example:
bigquery-public-data.thelook_ecommerce.orders
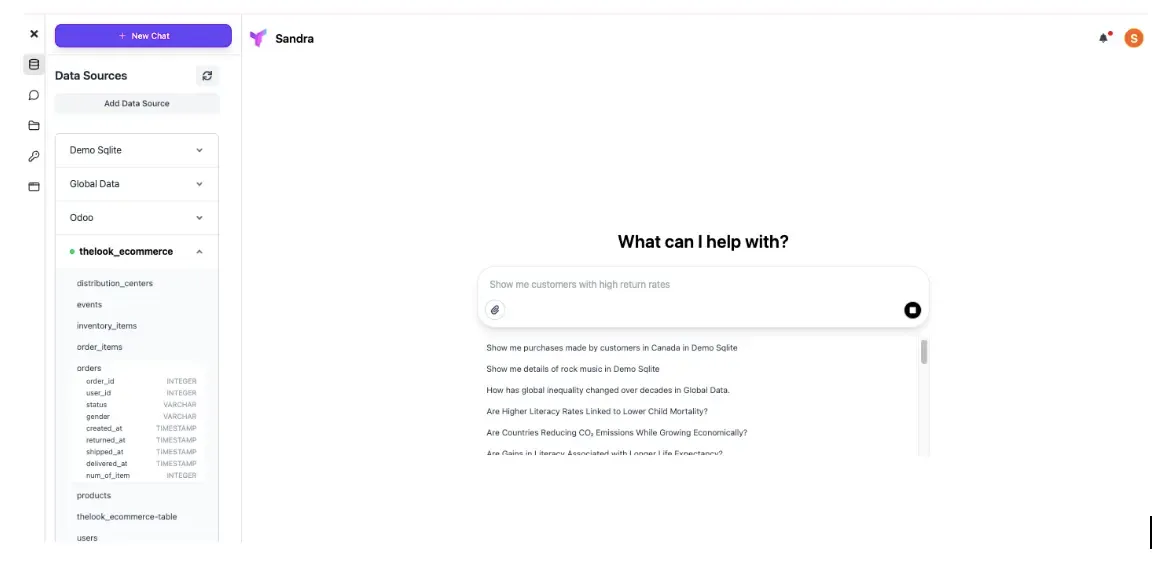
Method 2: Add Data Source from Chat Interface
This is the easiest and most direct way to connect your BigQuery dataset, right from the chat screen.
- From the Terno home screen, click Start Chat
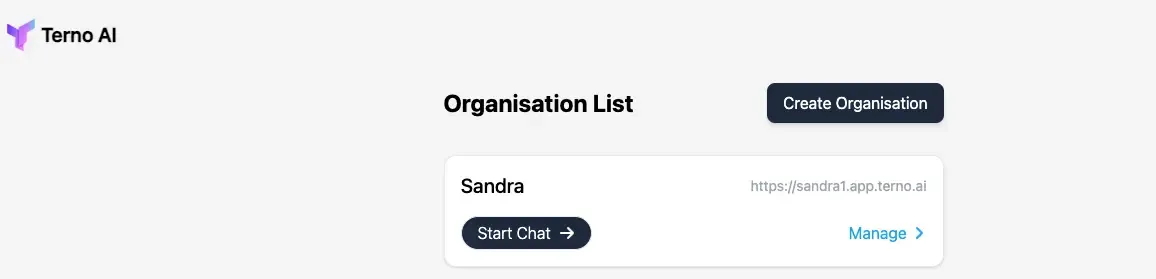
You will be navigated to the Chat Page, as shown below.
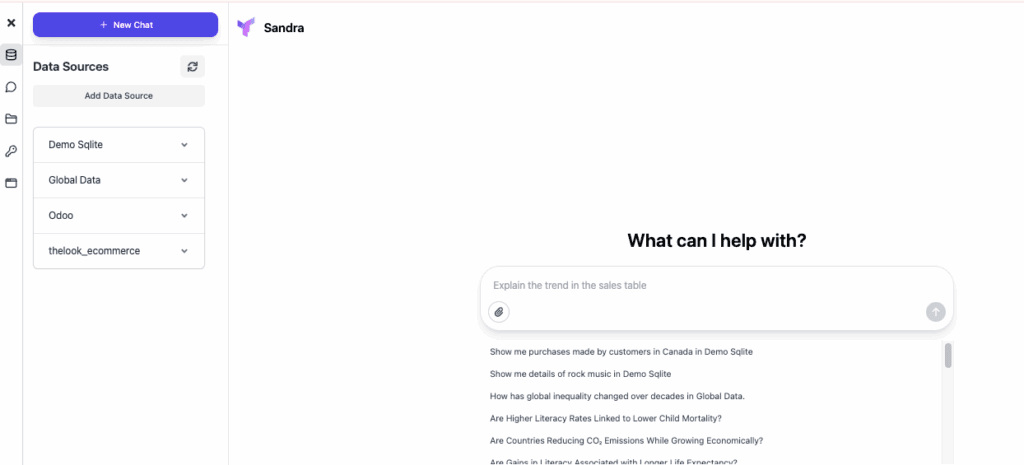
- On the Chat Page, you can view a list of your Data Sources on the left panel — such as Demo SQLite, Global Data, and Odoo. Click the “Add Data Source” button.
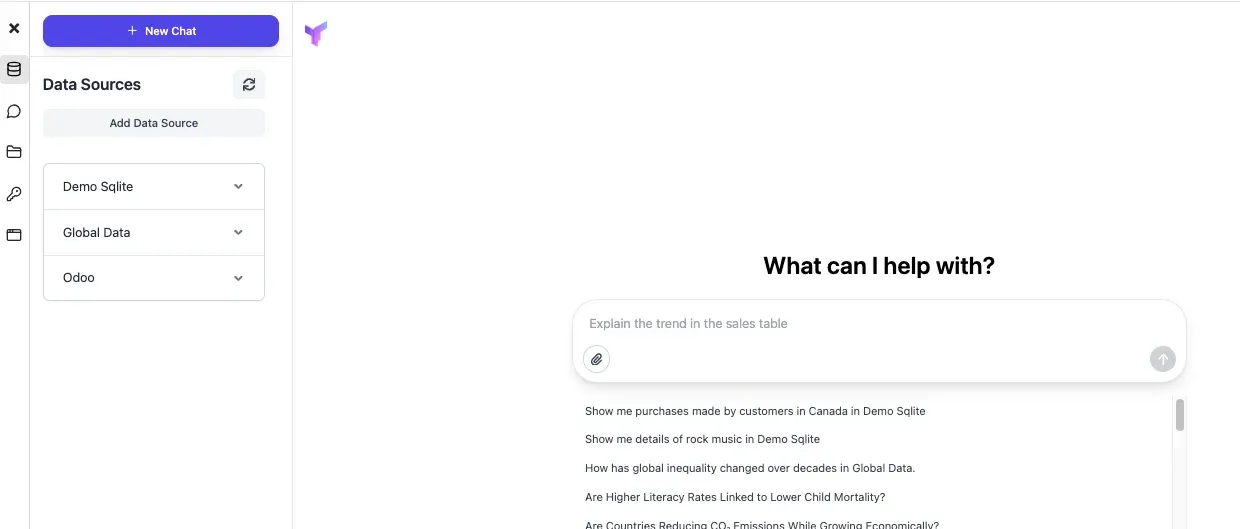
You will see a prompt to select or add a data source directly within the chat window.
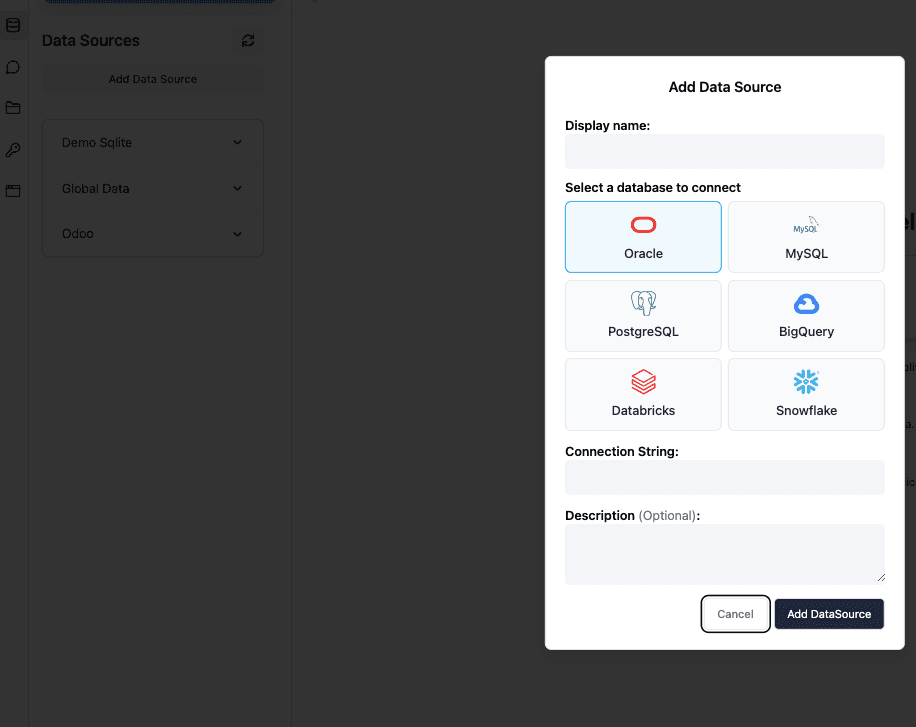
- Choose “BigQuery”
Select BigQuery from the list of available data platforms.
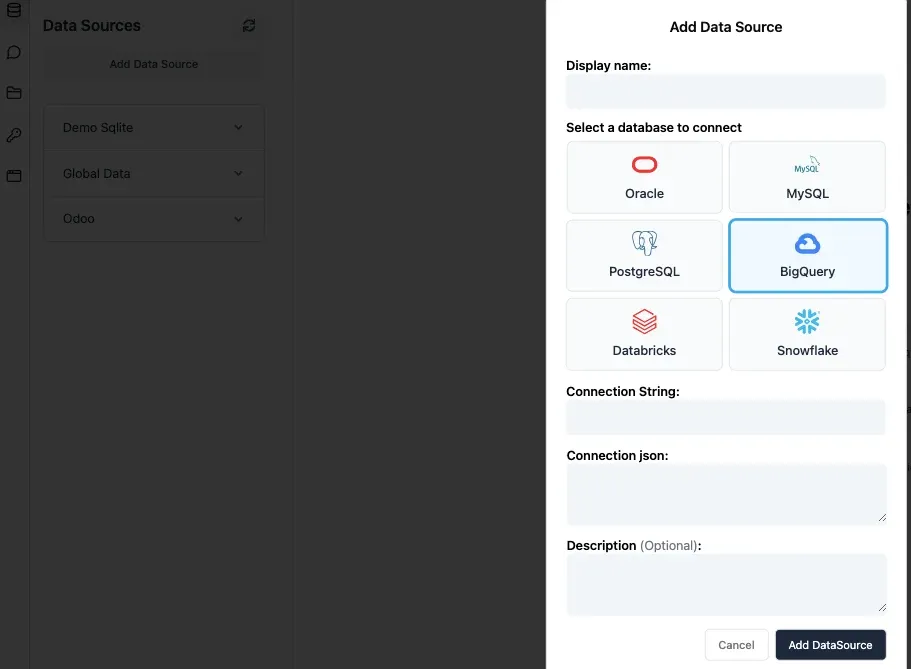
- Enter Connection Detail
Paste your BigQuery connection URL (e.g. bigquery://project_id.dataset_name.table_name
Paste your Service Account JSON credentials (from your Google Cloud Console).
Optionally, add a short description (e.g. Integration with BigQuery e-commerce dataset for weekly sales analysis).
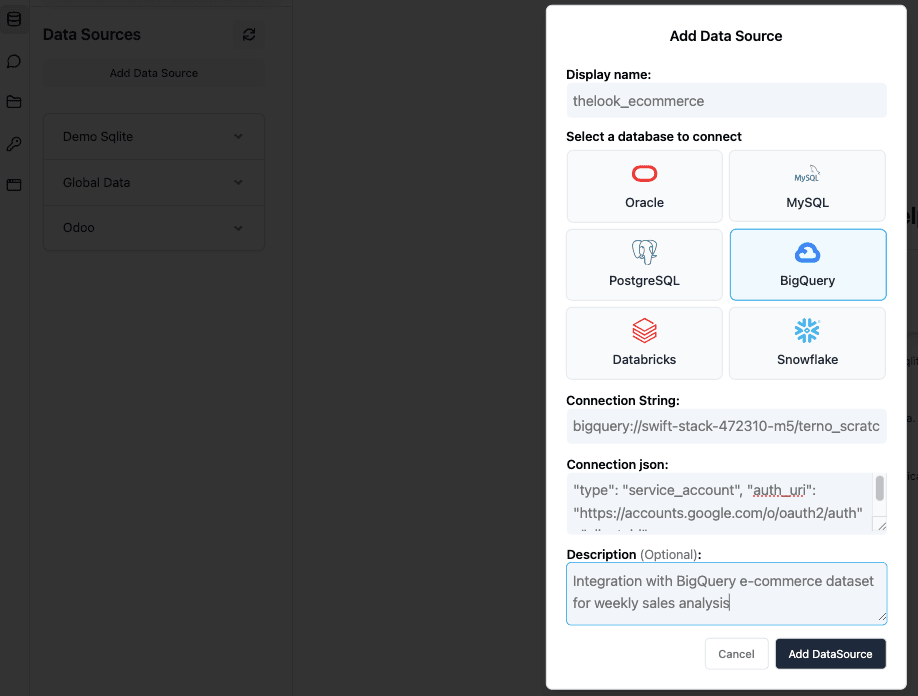
- Click Add DataSource
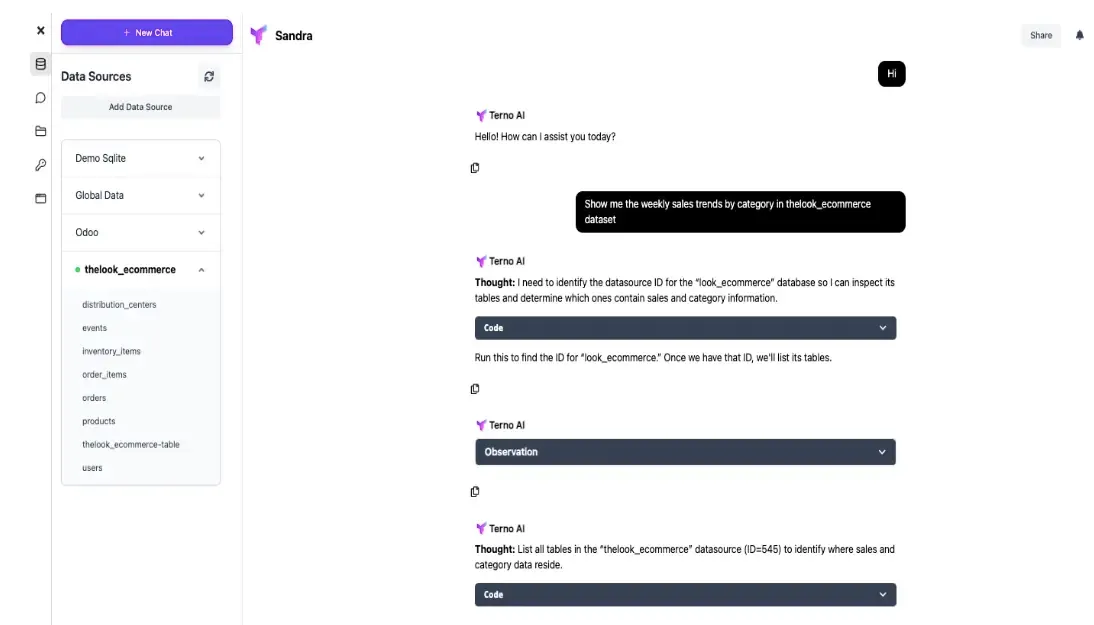
Terno validates the connection instantly and makes it available in your current chat session. The newly added data source will appear in the Data Sources list, along with any previously connected datasets.
Auto Import & Preview Data
Terno AI automatically loads the dataset preview.
Here you can view column names, data types, and sample rows — without writing SQL
Start Your Analysis
Now the real magic begins
Ask Terno questions in natural language (e.g., “Show weekly sales trends by category.”)
Generate charts, dashboards, and AI insights instantly.
Combine multiple tables or add filters interactively.
Save & Share Insights
Once your analysis is ready, you can:
Export results as CSV, Excel, or PNG.
Share interactive dashboards with teammates.
With Terno AI + BigQuery, your data stays in the cloud, and insights come to you — fast, visual, and secure.
Why It Matters
Traditional analytics workflows often involve complex SQL, ETL pipelines, or data engineering overhead. Terno removes all of that friction. By combining BigQuery’s scale with Terno’s no-code AI power, you get insights in minutes — not weeks.
** Example Use Case**
Identify top-selling products across weekdays vs weekends.
Detect sudden sales dips or anomalies.
Suggest restocking or pricing strategies.
** Who Benefits**
Data Analysts: Automate repetitive querying and visualization.
Retail Managers: Monitor daily performance without coding.
Executives: Make data-driven decisions faster with clear AI visuals.
The Future of Analytics
The Terno–BigQuery bridge turns raw cloud data into actionable intelligence, empowering every decision-maker to explore, predict, and plan confidently.
Ready to experience it?
Book a demo with Terno AI and watch how effortless BigQuery analytics can be. Interested to see how thelook_ecommerce BigQuery dataset reveals the real shopping behavior using Terno AI ?
Dive into our full analysis → Weekday or Weekend: When Do Shoppers Really Click “Buy”?
18 August 2026
The Honest Number Was 83%: Leakage, Abstention, and a Complaint Router You Can Actually Deploy
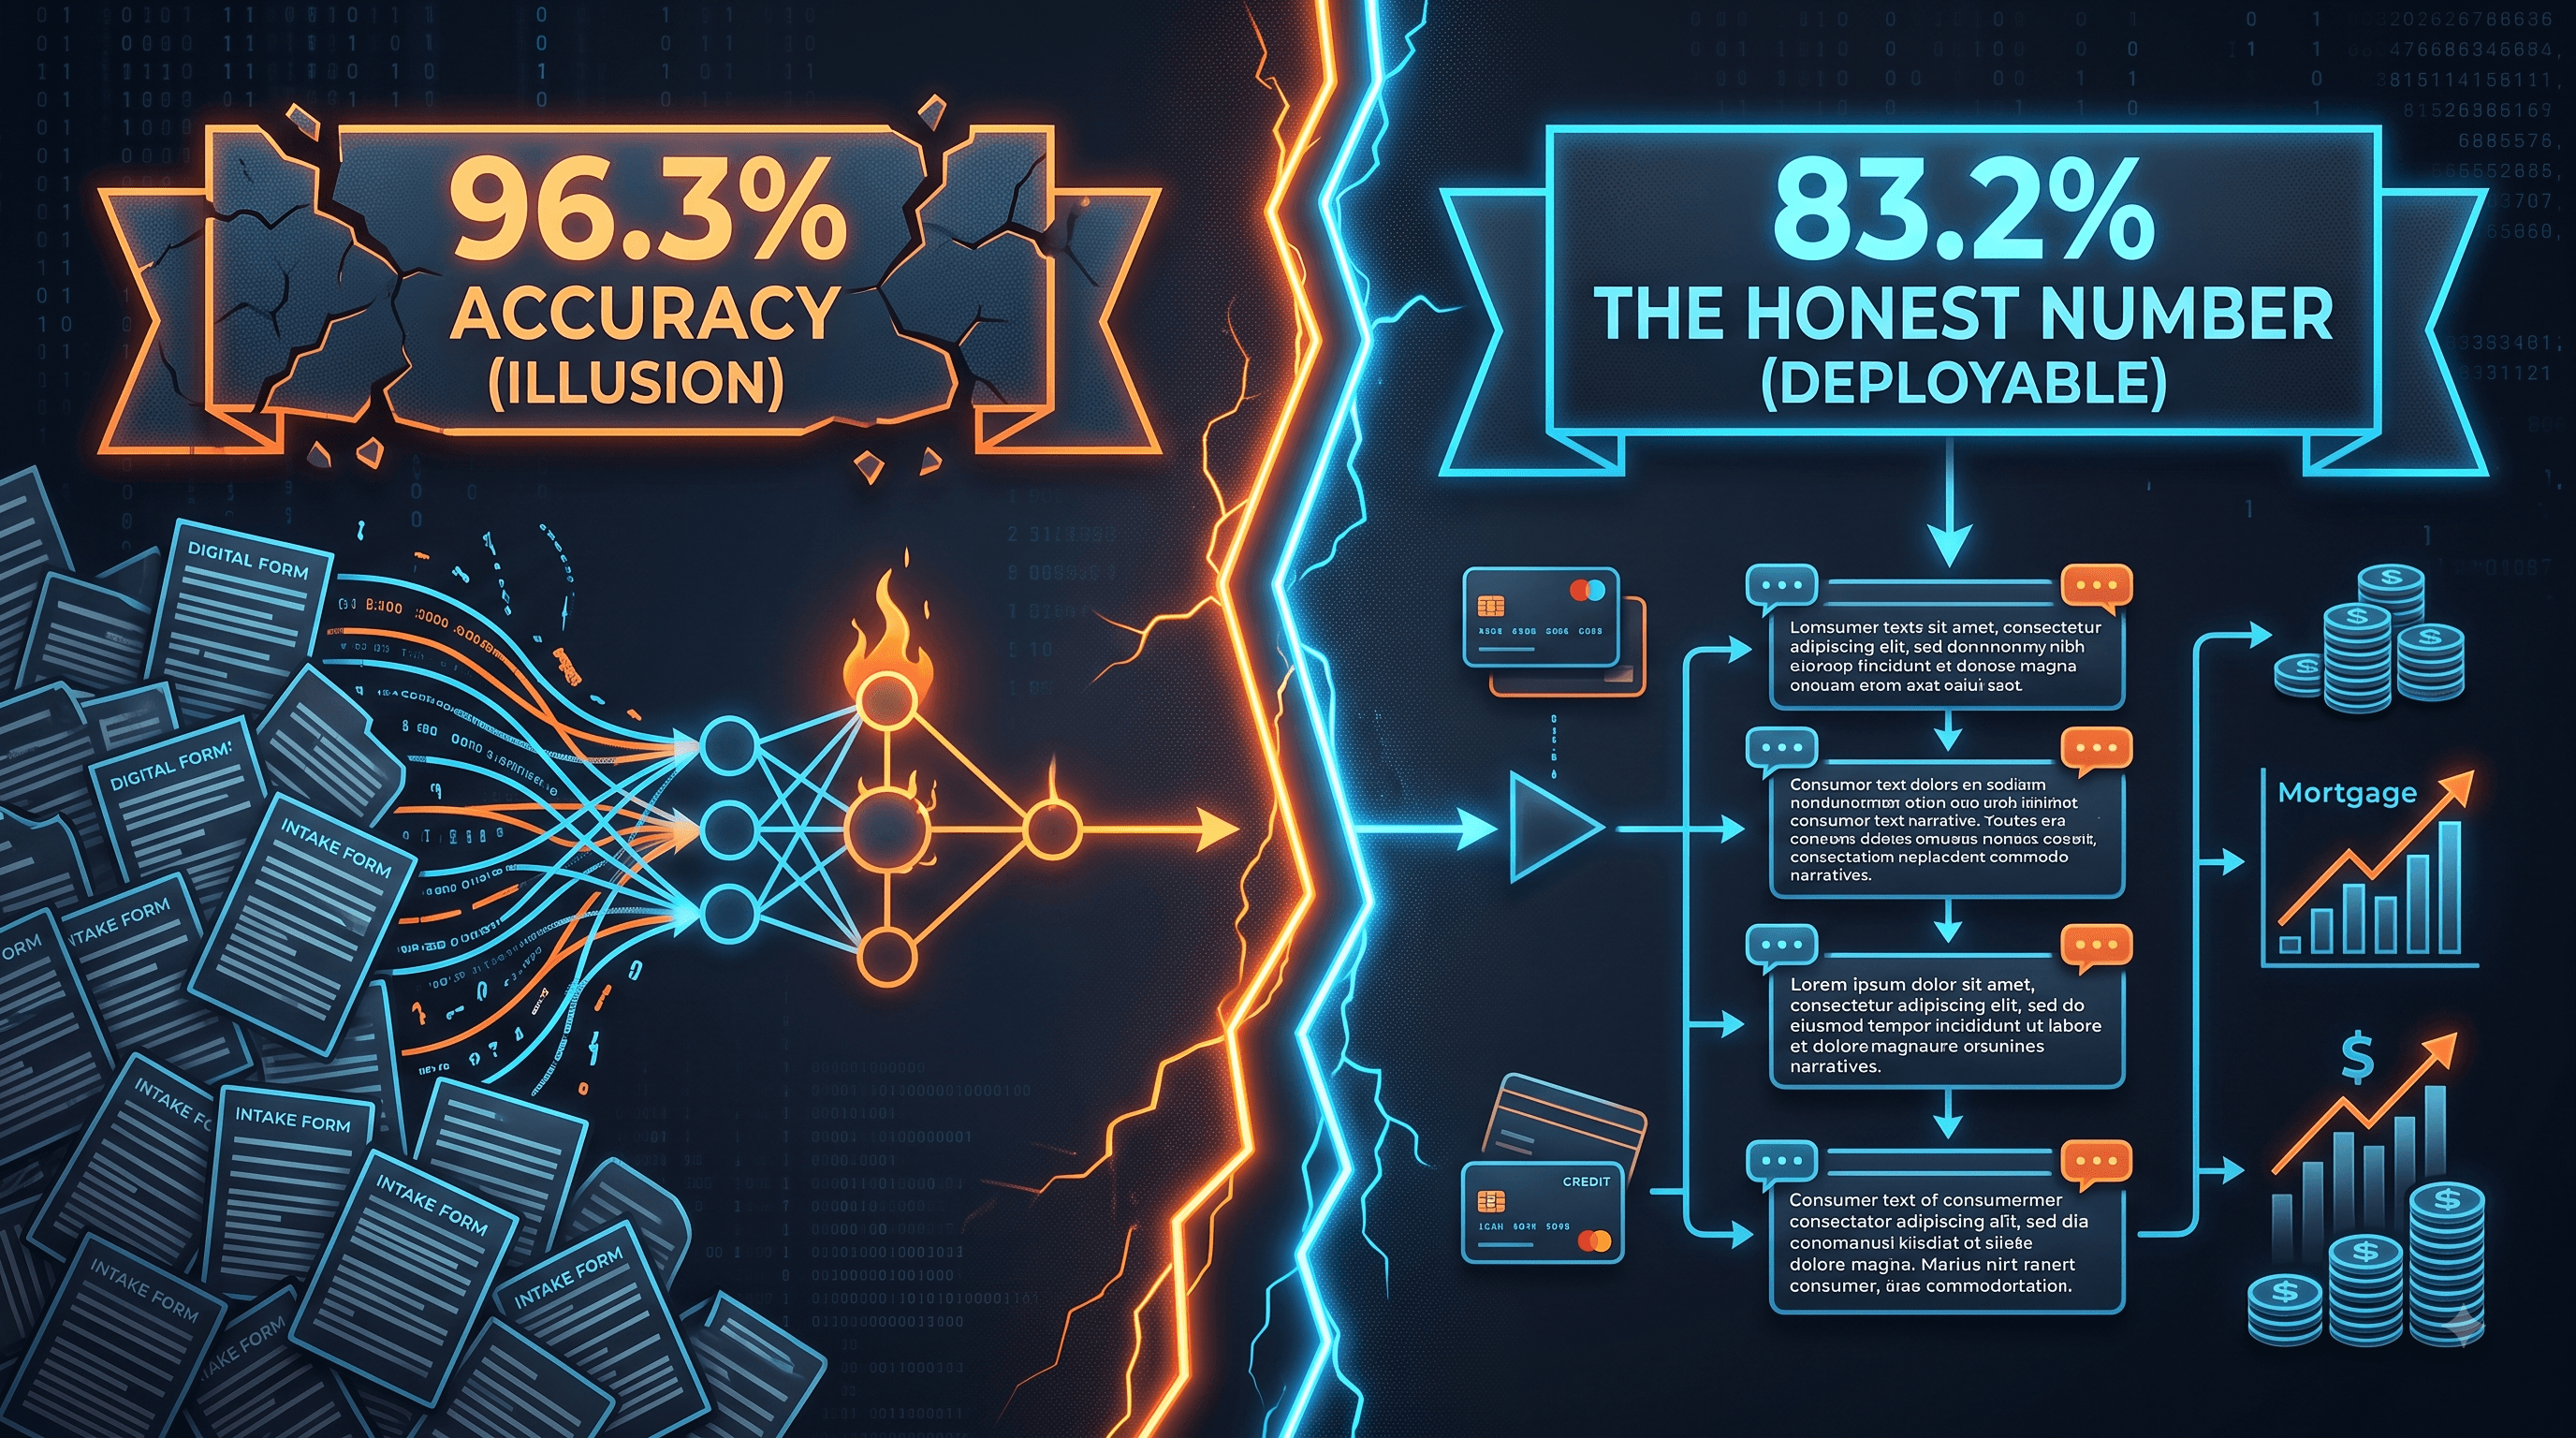
The same complaint-routing model scores 96.3% or 83.2% depending on which three columns you leave in the training data. The high number is the intake form being read back to you. This is what the leakage audit found before a single model was trained, why 83.2% is the honest figure, and how the same model — given permission to say "I don't know" — becomes deployable at 90.7% accuracy on 79.5% of traffic.
29 July 2026
EdgeGuard: AI-Driven Predictive Maintenance for Power Transformers
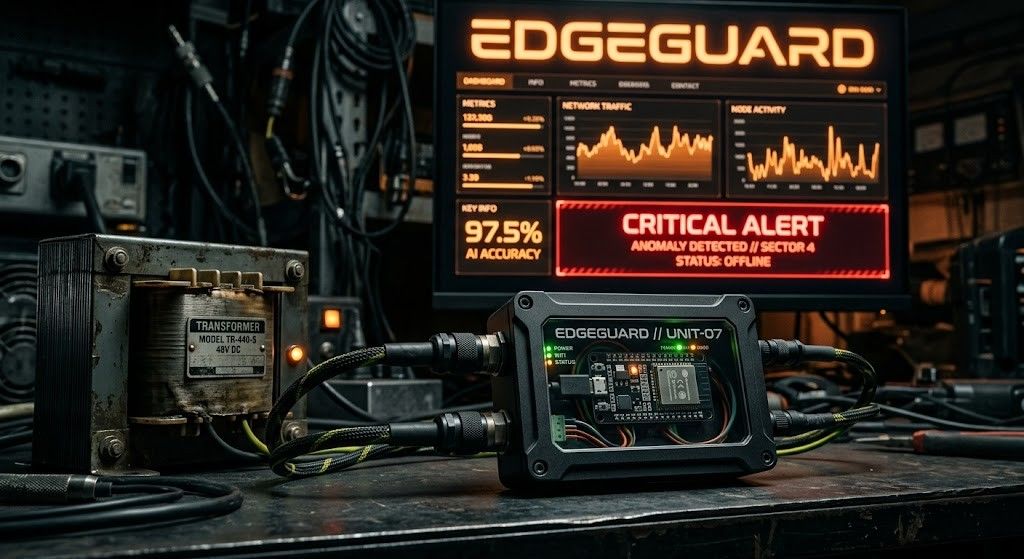
Power transformers are among the most critical assets in electrical distribution infrastructure. Their unexpected failure can result in power outages, safety hazards, equipment damage, expensive repairs, and long service interruptions. Traditional transformer maintenance practices often rely on periodic manual inspection, offline testing, or run-to-failure maintenance. These methods are expensive, slow, labor-intensive, and unable to detect rapidly developing faults in real time. EdgeGuard is an AI-driven, edge-computing predictive maintenance system designed to continuously monitor transformer health and forecast failures before catastrophic damage occurs. The system acts as a retrofittable “Digital Doctor” for distribution transformers by combining low-cost industrial sensors, an ESP32 microcontroller, local intelligence, machine learning-based risk prediction, autonomous relay control, and a real-time web dashboard. The proposed system monitors six major transformer health indicators: temperature, humidity, vibration, oil level, current, and voltage. These signals are normalized and processed through a Multi-Layer Perceptron neural network to classify transformer condition and estimate failure risk. If the predicted risk crosses a critical threshold of 80%, EdgeGuard automatically triggers a relay through GPIO 26 to isolate the transformer from the electrical network. The system also supports secure remote control, dashboard monitoring, API-key-based hardware authentication, JWT-based user access, WebSocket live updates, and automatic live-hardware detection. With an estimated deployment cost of approximately ₹3,850, EdgeGuard offers a low-cost alternative to conventional transformer monitoring systems. Its cloud-independent operation and edge-based decision-making make it especially useful for rural and semi-urban distribution grids where connectivity and maintenance resources are limited.

28 July 2026
ANALYZING TOXIC USER BEHAVIOR AND RISK PATTERNS IN ONLINE GAMING PLATFORMS
This study shows that behavioral data alone can't reliably predict gaming toxicity — but a risk-based model combining behavioral and engineered features does a much better job of flagging the small segment of high-risk users driving disproportionate harm.